Making your own oils is super easy, it's cheap and natural! There are tons of different things you can do with, but this time I chose for one of my favorites: Lavender oil.
What do we need?
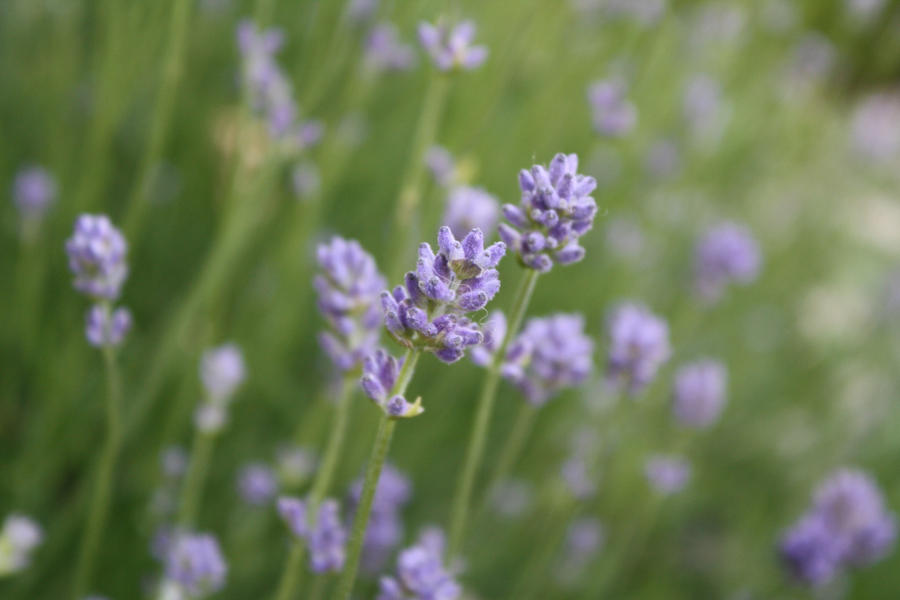
50 gr of dried lavender.
500 ml of sunflower or olive oil
a big clean glass jar
a nice sunny and warm spot
Put the dried lavender into the clean glass jar. (find more info on keeping things clean and hygienic here)
Poor the oil over the lavender, this isn't exact science, you might need a little more or less than the 500 ml, just make sure the buds are covered in oil.
Now place the jar in a warm and sunny place. Preferably on a window sil or something (if there's a heater nearby that's even more perfect) Keep it there for about 4 weeks, and stir the mixture every day.
After those 4 weeks you take some cheese cloth or a fine strainer to separate the flowers from the oil and you will have some very very nice smelling lavender oil. Lavender is great for your skin and the smell is calming. I really really enjoyed making this, if you want to try making your own oil I highly recommend it. The smell is just so amazing. You will not regret it.
vrijdag 16 november 2012
dinsdag 25 september 2012
Super easy bath salt DIY
Whenever I make something, I try to keep it as natural as possible, cheap and easy.
This week I decided to try something I'd never made before; bath salt.
vrijdag 7 september 2012
Sea Salt Scrub
Sea salt scrubs are a classic in the world of beauty and cosmetics. It's super easy to make yourself, 100% natural.
zaterdag 18 augustus 2012
Supermarket Spa Special
Creating
your own spa experience at home, using only natural products found in your
local supermarket. Yes, it can be done.
It’s easy, it’s cheap and you might already have some of these products
at home. So grab a cart and follow me!
zaterdag 14 juli 2012
Make your own perfume
donderdag 28 juni 2012
DIY: Galaxy print t-shirt
I love galaxy print, but items with this print are usually pretty expensive. Luckily there's an easy method to make your own galaxy print and save some money.
What do we need?
*shirt, dress or any other type of clothing
*spray bottle
*bleach
*fabric paint
Fill the spray bottle with bleach and water, I used a 50/50 ratio. Spray the mixture onto your shirt and let it dry, this is important because if you just spray a whole bunch of the mixture on there you might not get the result you want. Once dry, you can see what the mixture has done so far and you can spray some more on the areas you want to be lighter. You can also use a brush to splash some of the mixture directly onto the shirt to get bigger blobs.
Once dry, it's time to use the fabric paint. Mix a little fabric paint with some water and just splash it on there to get small splashes on your shirt, little white stars. The less water you use the whiter the and clearer the splashes will be. You can also paint some stars directly on there with just fabric paint. You can use the standard white, but also a small amount of other colors, like dark blue or yellow. Continue the process until you're happy with the result. Let the paint dry, fixate it and enjoy wearing your tee.

These are the two tees I made. As you can see the bleach can have a different effect depending on the color of your shirt. I got some white bleach marks on my dark blue shirt, and some red shades on my black shirt.
Feel free to experiment and have fun with it!
What do we need?
*shirt, dress or any other type of clothing
*spray bottle
*bleach
*fabric paint
Fill the spray bottle with bleach and water, I used a 50/50 ratio. Spray the mixture onto your shirt and let it dry, this is important because if you just spray a whole bunch of the mixture on there you might not get the result you want. Once dry, you can see what the mixture has done so far and you can spray some more on the areas you want to be lighter. You can also use a brush to splash some of the mixture directly onto the shirt to get bigger blobs.
Once dry, it's time to use the fabric paint. Mix a little fabric paint with some water and just splash it on there to get small splashes on your shirt, little white stars. The less water you use the whiter the and clearer the splashes will be. You can also paint some stars directly on there with just fabric paint. You can use the standard white, but also a small amount of other colors, like dark blue or yellow. Continue the process until you're happy with the result. Let the paint dry, fixate it and enjoy wearing your tee.
These are the two tees I made. As you can see the bleach can have a different effect depending on the color of your shirt. I got some white bleach marks on my dark blue shirt, and some red shades on my black shirt.
Feel free to experiment and have fun with it!
zondag 24 juni 2012
Hot oil hair treatment.
I made this recipe 2 or 3 months ago, and I was surprised to find out I hadn't written a blog post about it!
This hair treatment/mask is a great way to give your hair a much needed boost and make it shiny and soft.
What do we need?
*15 gr of calendula oil
*15 gr of chamomile oil
*15 gr of wheat germ oil
*5 drops of lavender essential oil
*5 drops of rosemary essential oil
Mix all the ingredients together in a bottle and let it rest for a couple of days before using it. Yep, it's that easy.
So how do we use this?
We need
* oil treatment
* towel
* glass or ceramic boil to heat the oil
Take about 6 tablespoons (more or less, it all depends on how thick/long your hair is) and heat the oil using a double boiler. Don't get it too hot, just nice and warm to the point where you can still handle it without burning yourself. Heating the oil will help your hair absorb the oils and increase the treatment's effectiveness.
Distribute the oil onto your hair and wrap a warm and wet towel around your head. Leave the treatment in for at least 30 minutes and then rinse and shampoo your hair. Let it dry and enjoy softer hair!
Abonneren op:
Posts (Atom)